

From meal photo to edited entry
Keep a meal photo, then check the food and portions.
Ways to record a meal- Photo diary
Look back at a saved meal photo in your diary. Photo saving and AI analysis have separate progress states.
- Review estimates
Review the foods and estimated amounts found by AI. Information that still needs checking stays marked for review.
- Edit amounts
Change the amount to match what you ate, then save. You can edit the estimate instead of accepting it as it is.
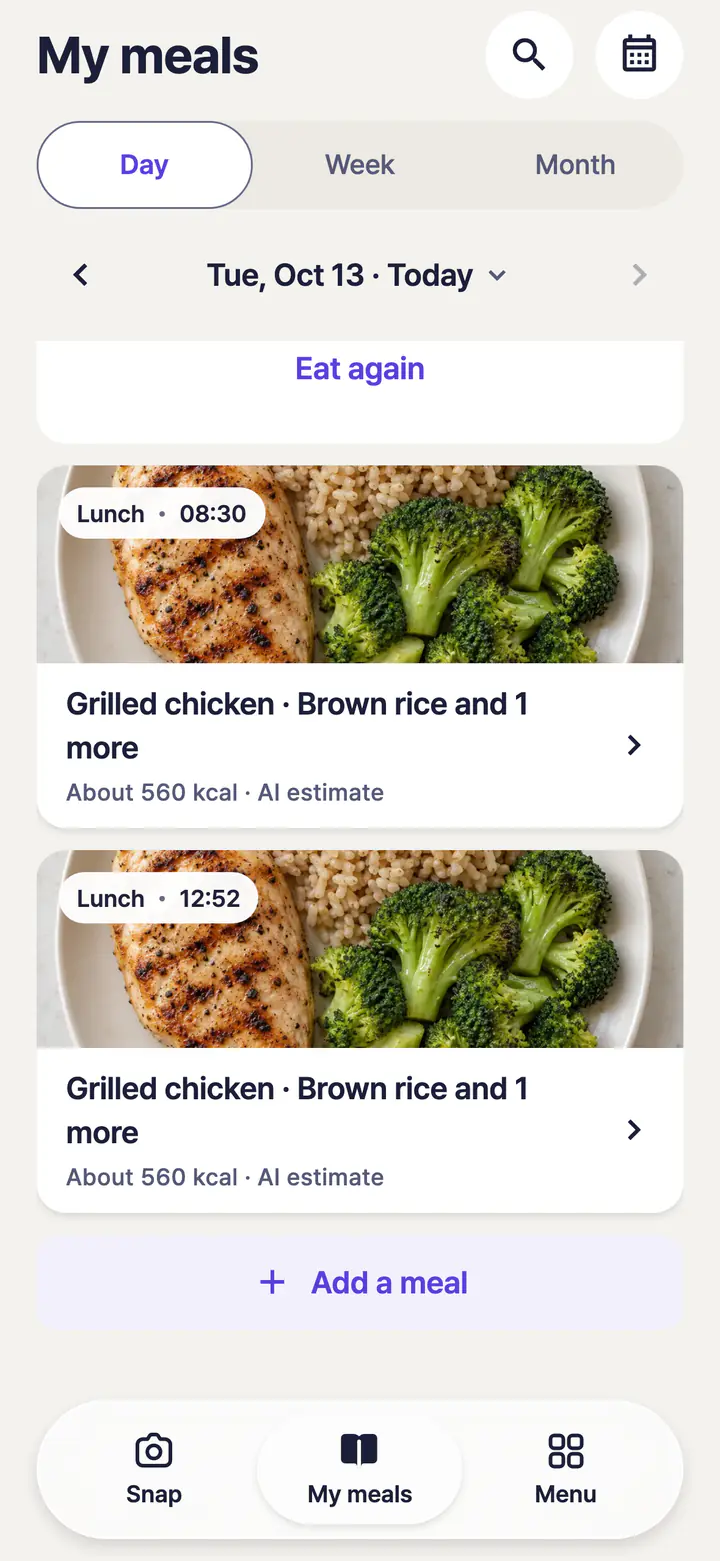
Example · Not a customer record
Look back at a saved meal photo in your diary. Photo saving and AI analysis have separate progress states.
Contents
Ways to record a meal
Take a meal photo in the camera screen, or tap “Photos” to choose a saved photo. Check the date before saving. If you select photos of several meals, review the photos and date for each meal.
To record without a photo, open the logging options with “Other ways” on the camera screen or the + button in “My meals”. Use “Describe a meal” to say or type what you ate, “Search foods” to find and pick a food, or “Recent and favorites” to log a meal you had before. “Choose from photos” records a photo you took earlier.
A saved photo is recorded on this device and kept with your account. After a successful save, open the meal entry to see the photo or details you entered. A photo saved on your device does not mean saving to your account or AI analysis is finished.
Check AI analysis status
Read the consent information in the app before using AI photo analysis. You can still record photos without agreeing to analysis. To withdraw consent, tap “My profile > Manage data > Withdraw required consent”.
A saved photo may show that it is waiting to send or being analyzed. Foods found early are not yet a complete result, and the analysis preview is not included in meal totals. Open the meal entry to check progress and results.
Analysis may find a food name without enough information about its amount or nutrition. Review items that need checking and make your own edits. Missing information does not mean a nutrition value is zero.
Checking a result checks the progress of the existing analysis. If a separate “Analyze again” option appears, read its guidance and check your remaining allowance before choosing it. You do not need to log the same photo again while you wait.
Edit foods and amounts
Open a meal from “My meals” and compare the photo with the food list. If a food is wrong or missing, choose “Edit food” and use search or manual entry to change it. If you know the food's name but not its nutrition values, you do not have to fill in values you cannot confirm.
To change an amount, tap the food row or “Adjust amount”. Choose or enter what you ate, then tap “Save amount”. Available units can differ by food. You can mark a food you did not eat with “Not eaten”.
If a new AI result arrives after you have edited an entry, your edits are kept. When suggestions are available, open “Compare with the AI result” and choose “Keep my changes” or “Use AI result”. Opening the comparison alone does not change your record.
Return to the meal entry after saving to check the foods and amounts. Your record can reflect what you know you ate, beyond what is visible in the photo.
Organize dates and revisit meals
Check when you ate the meal while choosing its photo. Use “Time unknown” if you do not remember the time. Find records without a date in the unsorted list and organize them when you know the date.
If an existing entry has the wrong date, open its date and meal settings, make the change, and save. Choose a date in the photo calendar to return to that day's meal entries.
The weekly summary brings together recorded information. A day without records does not mean you ate nothing, and some meals may be missing nutrition values. The AI coach's weekly review is a separate feature for reflecting on your chosen action and check-ins.
Closing a screen is different from deleting a saved meal. To delete one, open that meal's “More > Delete” and follow the confirmation.
When saving or analysis gets stuck
Is camera or photo access unavailable?
Follow the app's guidance to check permissions in your device settings. If you cannot use the camera, choose a photo from your library or enter a meal manually. Library access depends on which photos you have allowed the app to use.
Are you offline?
Check the records saved on this device and the status of anything waiting to send or be analyzed. AI analysis and saving to your account need an internet connection. Reconnecting does not mean every task has finished, so check the completion status in the app.
Did the app say it couldn't save?
Do not assume the entry was saved after a save error. Check your device storage and the message in the app, then try saving again. Check whether the photo is already in your meals to avoid a duplicate entry.
Is the photo there without an analysis result?
Check the entry's analysis status, your consent for AI analysis, and your remaining allowance. If the photo was saved, you can enter foods and amounts yourself even when analysis fails. If the problem continues, contact support with your device type and app version.
How analysis works and its limits · Free and Plus allowances